3 weather report.

3.31.2011

It is 42 degrees outside today!  It's probably premature, but we put together our new patio set last night just in time to enjoy the nicer weather.
There's a good chunk of grass showing in our yard...nevermind the fact that it's more brown than green!
I'm hoping we'll be able to put the shovels away for good!  
I'm sporting bare feet with my jeans and a sweater.  The deck is nice and warm in the sun! (and yes, I need a pedicure!)
And the pool is....still frozen.  It's going to take quite a few more warm days to thaw out that block of ice! 
Hopefully this means winter is over!  I'm too afraid to check the weather.  And apparently too lazy to go upstairs and grab the camera...hence the iPhone pics.

35 herringbone block tutorial.

3.30.2011

Want to learn how to make a herringbone block?  Here's your chance!

You will need:
  • 14 strips of fabric, 2.5" x 11" long (this is a great use of scraps or a jelly roll!)
  • 6.5" x 24" ruler, or a template of a rectangle, 6.5" x 12.5".
Note: all seam allowances are 1/4".

1.  Cut 14 strips, 2.5" x 11" long.  You can cut 2 strips from 7 different fabrics, or just 1 strip from 14 different fabrics, if you want to go scrappy. (This method creates a bit of waste on some of the strips.  While you can always use those bits as part of the back of your quilt, keep this in mind when using your favorite fabrics!  Use those precious strips in the middle of the block, not on the ends.)

2.  Sew two sets of three strips together.  Sew your the fourth strip onto one of the sets of three, 1.5" from the left edge (take a look at the picture below to see what I mean).  Then sew your second set of three onto your fourth strip, 1.5" from the left edge of that strip.  Press all seams open.

3.  Turn your block on it's side so that the left edge of the first three strips are on a diagonal.  Place your 6.5" x 24" ruler or template on top as shown.

4.  Align the left corner of the ruler/template with the intersection of the edge of strips 2 and 3.  Align the right corner of the ruler with the edge of strip 1.

5.  Cut along the bottom edge of your ruler/template.

6.  Cut along the right and left edges of your ruler/template, all the way to the top of the block.

7.  Square up your block to 6.5" x 12.5" by cutting the top side of the block. (If you are using a template, you can just cut along the top side of the template.)

8. One half of your block is finished!

9.  Repeat step 2 with your remaining 7 strips, except stagger your strips from the right side of the first set of three, rather than the left.  The layout of your strips should look like a mirror image of the block in the picture in step 2.

10.  Turn your block on it's side so that the right edge of the first three strips are on a diagonal.  Place your 6.5" x 24" ruler or template on top as shown.  Align the right corner of the ruler/template with the intersection of the edge of strips 2 and 3.  Align the left corner of the ruler with the edge of strip 1.

11.  Cut along the bottom and sides of your ruler/template.

12.  Square up your block to 6.5" x 12.5" by cutting the top side of the block. (If you are using a template, you can just cut along the top side of the template.)

13.  Now both halves of your block are finished!

14.  Pin your blocks together at the center, matching up the seams as you go.

15.  Sew the blocks together, press seams open, and you have a finished block! This block finishes at 12.5" square.

I hope you enjoyed the tutorial!  If you make any of these blocks, please post them to the Bijou Lovelies flickr group.  I would love to see how they turn out!

6 secret sewing.

3.29.2011

Another item for my Make Mine Modern Swap partner....this time I think I'll leave it a secret until I send it out!


Any guesses as to what it is?

2 shop update...finally!

3.27.2011

I finally got a few things listed in my shop!  There are a few market totes in there now, with more to come in the next week.
It feels good to not have an empty shop for once!  :)

6 words to live by.

3.25.2011

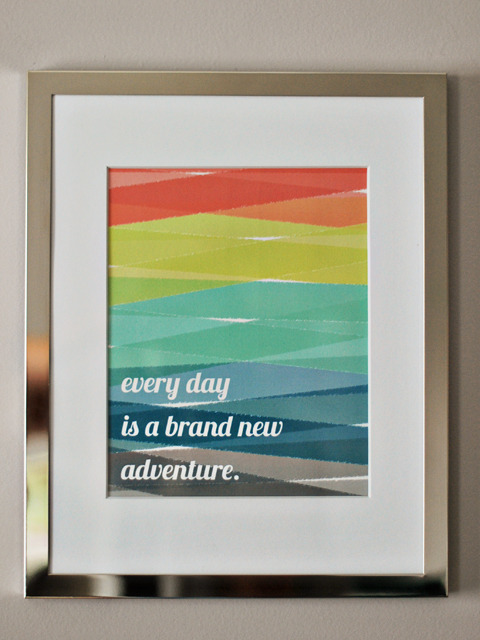
Happy Friday!  Just a few words of wisdom for today, hopefully you'll have some time to take my advice this weekend!


4 old and new.

3.24.2011

I've picked up a few new and old (but new to me) things for our house recently.  Shall we start with this awesome vintage mid-century modern side table?
I believe it's solid walnut (it matches the trim in our house perfectly) with dovetailed joints in the drawer, and was made by Lane sometime in the 60s I think.  I picked it up for $20 at the Re-Store which I thought was a good deal considering it is in perfect condition!

I also bought this mirrored tray at the Re-Store for $5.  It will probably end up living upstairs on a nightstand in the guest room once we actually do something with that room.
I found this awesome brass owl (I think it's an ashtray?) at another local thrift store (St. Vincent's) for $1.25.  I love all of the detail on it!  It's so pretty.  I picked up the book at the same store, mainly because I liked the color and the pattern on the front.  It's called "Joyful Adventures"...I think it's a children's book.
The white milkglass bowl is from the same store for $2.00.  I really like the pattern on it!  I filled it with crackled glass ornaments I got on clearance after Christmas.
The lamp is from HomeGoods, it's so pretty the way the light bounces off of it!  I think it was about $50.
So there you have it!  A mix of old and new treasures, waiting to be seated in our living room next to the lovely new sectional couch that will be delivered tomorrow!  

3 wishing for spring.

3.22.2011

It's been kind of depressing outside lately.  Wet, cold, and dreary.  We are supposed to get 10+ inches of snow tonight.  Of course, since pretty much all of the snow melted yesterday, we have to get hit with another snowstorm!  I've been staying busy inside, working on some market totes. 

I came up with a new and improved method of writing out my logo...using my free motion foot on my machine!  It's much faster than embroidering it.
Starting a new quilt...in bright, springy solids.
I also did some furniture shopping and thrifting recently; the spoils of those trips will be coming soon!

4 instant gratification.

3.18.2011

Sometimes I just need instant gratification.  This time it came in the form of some fun coasters.
I really liked the teal/blue/lime/gray color scheme I used in this pillow, so I used up some of the leftover scraps to make a set of 6 coasters.  There are two different designs in the set.
I used leftover batting scraps in the middle and backed them in linen.

These may be headed to my shop soon! 
I've been working on some other items for the shop as well....including a few market totes that I've had cut for months!  I hope to finally list them next week sometime.

7 bundled up: green.

3.17.2011

In celebration of St. Patrick's Day, a green bundle o' fabrics for you.
Here's the breakdown of the fabrics I chose:
 

Here are all the greens, grays, and whites one more time, all together.
Hope you're enjoying the day with a green beer!  I know I will be soon :)

0 swatch 5.0.

3.16.2011

Today's swatch is perfect for spring!  I'm in a springy mood since it's actually 50 degrees outside right now.

9 single girl blocks.

3.15.2011

I finished two single girl blocks over the weekend.
They go together much quicker than I would've thought.  I don't even mind sewing the curves!  Although I haven't tried the no pin method yet!

I'm not exactly sure what I'm going to do with the blocks.  Maybe make a couple of wall hangings?  Or I might keep going and make a queen size quilt.  I'm not usually this indecisive!  What would you do with them?
Related Posts with Thumbnails
 

Blogging tips