I've been cutting fabric for the past few nights for my next quilt. I finished tonight and it's finally time to start sewing. I'm excited to put all the little blocks together, and a little nervous to see how long it will take. It's a little bit of an ambitious project.
A houndstooth quilt! So many little blocks! But I can't resist the houndstooth. It's so preppy and cute. I didn't cut my hands on the rotary cutter while making all my pieces, so we're doing well so far. Fingers crossed that I can get all the little squares to match up!
22
 time for a giveaway!
2.25.2010
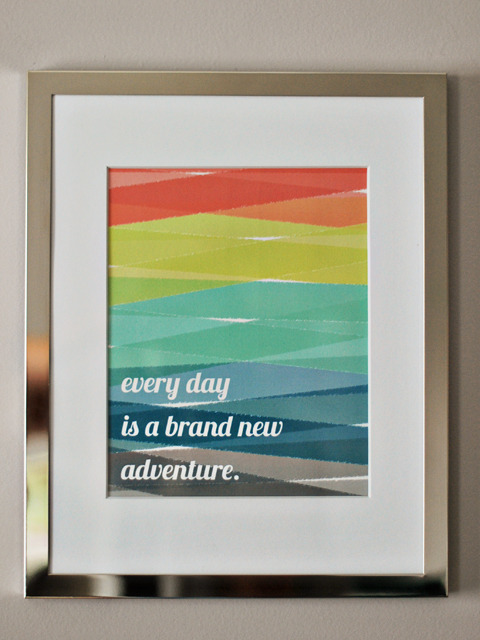
Are you sick of hearing about the circle quilt yet? I'm sure you are. But I found an adorable wall hanging/mobile that would look absolutely perfect in a nursery or child's room (or any room for that matter) with a circle quilt.
I think it's about time for a giveaway around here, don't you? AllChildrensFurniture.com has graciously offered to giveaway this super cute piece of art to one of my readers! It would look amazing if any of you are planning to make a circle quilt, or with a modified circle quilt that some rounded rectangles thrown in there as well (I think I've just thought of a new quilt pattern!). Or if you're not in the mood/don't know how to sew, it would also work with some of the cute kids bedding from AllChildrensFurniture.com!
There are three ways to enter:
1. Leave a comment here and tell me what bedding you would pair with it from AllChildrensFurniture.com.
2. Become a follower of this blog (or tell me you're already a follower)
3. Tweet this giveaway:
"I want to win a wall hanging from @bijou_lovely and AllChildrensFurniture.com! http://bit.ly/ciaCcu"
A separate comment must be left for each entry. Please make sure to leave your email address in your comment or make sure it is linked in your profile so I can contact you if you win.
The contest ends on Tuesday, March 2nd at 11pm CST. I will post the winner on Wednesday. Good luck!
1
 Question, anyone?
2.24.2010
I caved and finally created a formspring account yesterday. I've only answered a few questions but it's kind of fun so far! My inbox is currently empty so if you have a question for me you can enter it in the box on my sidebar or by clicking here. Also if you have an account, leave it in the comments so I can follow you!
21
 the circle quilt tutorial, part two: assembling the blocks.
2.21.2010
Update: I've re-written this tutorial, you can find the new one here! But you can still use this old one if you prefer instead :)
Now that you've made your blocks, it's time to put them together to make a circle quilt!
1. Arrange all of your blocks the way you'd like them to be for your quilt. To make a 38" x 50" quilt, you need 6 blocks across by 8 blocks down. You can arrange them randomly or in a pattern. I am incapable of doing anything completely random, so there is a pattern to mine. Each row has one circle of each color in it. If you look at the green circles, you'll notice that down the rows, the green circle shifts over by 2 blocks. Then the yellow is next, then orange, then blue, then I wrap back around to the beginning with purple and then brown. This pattern continues throughout the quilt. Then label your squares using paper, tape, etc so you know where each circle goes. I used a letter for each row and a number for each column, so my first green circle is A1, then the yellow is A2, and the purple circle in the next row is B1, then B2, etc.
2. Sew each row together. Take two adjacent circles (A1 and A2 for example). Place A1 right side up and A2 right side down on top of A1 and pin them with right sides together.
3. Sew along the right side with a 1/2" seam allowance. Note: I think 1/4" is a more common seam allowance for quilting, but since we are beginners, it's nice to have the extra room!
4. Open your blocks. They're connected now! Trim your threads on each end of your seam.
5. Pin the next block in the row (in this case F3) to the rightmost block (in this case F2) with right sides together and sew along the right edge with a 1/2" seam allowance.
6. Repeat step 5 until your entire row is sewn together.
7. Press the seams open.
8. Repeat steps 6 and 7 until all of your rows are finished.
9. Now it's time to connect your rows. Take your first row (A1-A6) and place it right side up. Place the second row (B1-B6) on top of the first row face down (so rows A and B are right sides together). Pin together, trying to match up the cross seams if possible so you will have a nice grid pattern to your blocks. If the seams don't match up perfectly, don't worry too much, no one will look that closely (at least that's what I tell myself!).
10. Sew along the bottom edge of the rows using a 1/2" seam allowance. Trim your threads at each end when you're finished.
11. Press seams open.
12. Repeat steps 9 and 10 until all your rows are sewn together.
13. Your quilt top is finished! This is a good time to square up your edges to make sure they are straight.
14. Cut your backing fabric to the size of your quilt front (which should be about 38" x 50"). Note: Measure twice, and cut once or you will have to sew multiple panels together like I had to!
15. Now we are going to make our quilt sandwich. Lay your backing fabric out on a large surface with the right side facing down. Smooth it out the best you can.
16. Trim your quilt batting to size. It's okay if it's slightly larger, you can trim it exactly one you're done quilting.
17. Place your quilt batting on top of your backing fabric and smooth it out. Make sure it comes to the edges or overlaps them a bit on all sides.
18. Place your quilt top on top of the batting with the right side facing up. Smooth it out the best you can and make sure the edges are aligned with the quilt backing.
19. Carefully pin your quilt sandwich together. Quilting pins are the best thing to use for this, but regular large safety pins work okay too. Start in the middle of the quilt and work your way to the edges, smoothing it out as you go. I pinned at the intersection of each block to make sure it all stayed in place while I sewed it all together. Make sure your pins go through all the layers (top, batting, and backing).
20. When your entire quilt sandwich is pinned in place, it's time to start sewing it together. Use a regular straight stitch and outline each circle again. It's helpful to start in the middle and work your way to the edges. On a regular sewing machine (not a long arm machine) you will have to roll your fabric to push it through as you sew. Go as slow as you need to, this part takes awhile!
21. Make sure to pull your threads to the back for each circle, tie them in a knot and trim the threads.
22. When you're finished quilting, your circles will look nice and puffy! The hardest part is now over. Trim the edges of your quilt sandwich to make them straight and square.
23. Now it's time to sew on your binding. I watched this video to learn how to bind a quilt. Hand-stitching the binding to the back of the quilt is definitely the most tedious part. It takes forever but it's worth it in the end.
24. Wash and dry the quilt. It will come out all wrinkly and soft and guess what -- it's finished! Wrap up your little one in their beautifully modern circle quilt!
I really hope you enjoyed this tutorial! Please share pictures with me if you decide to make one, I'd love to see them all! Also, I'd be happy to answer any questions you have, just leave me a comment.
Looking for part one of this tutorial? Click here.
39
 the circle quilt tutorial, part one: creating your blocks.
2.18.2010
Update: I've re-written this tutorial, you can find the new one here! But you can still use this old one if you prefer instead :)
Thank you all so much for the wonderful comments on the circle quilt! It seems like there is an interest for a tutorial, so here it is. I'm going to split it into a few posts because there are a lot of steps.
Step 1: Pick out your fabrics!
For a 38" x 50" quilt, you will need: 2 yds fabric for main blocks - I used white Kona cotton
1/4 yd each of 6 coordinating fabrics for circles
2 yds medium weight fusible interfacing
2 yd fabric for backing - I used a confetti print flannel
38" x 50" low loft quilt batting - I bought a package that was crib sized (45" x 60")
5 yd double fold bias tape - I used 2 packs of 7/8" light gray double fold bias tape (total of 6 yds)
Coordinating thread - I used light gray to match the binding
 Step 2: Iron your interfacing to the wrong side of one of your circle fabrics. This will make the circles easier to applique onto your quilt, and it also makes the fabric less likely to fray. It's best to start in the middle of your fabric and work your way out towards the edges. Press your iron down onto the fabric and then lift up and move to the next place rather than moving the iron around on the fabric. This technique helps prevent wrinkles and bubbling in the fabric.
Step 3: Use a template or circle cutter to cut out a circle that is 5" in diameter. Cut out 8 circles from each fabric.
Step 4: Repeat Steps 3 and 4 with the rest of your circle fabrics. You should have 48 circles when you are finished, 8 of each of the 6 colors.
Step 5: Cut out 48 squares that are 7 1/4" x 7 1/4" from your block fabric. It helps if you have a husband who will cut you a plexiglas template. Then there is no measuring and squaring up required! My favorite kind of fabric cutting :)
Step 6: Iron your circles and blocks.
Step 7: Fold your circle in half and press.
Next, we'll assemble the quilt top and put it all together! Click here for part two of this tutorial.
Thank you all so much for the wonderful comments on the circle quilt! It seems like there is an interest for a tutorial, so here it is. I'm going to split it into a few posts because there are a lot of steps.
Step 1: Pick out your fabrics!
For a 38" x 50" quilt, you will need: 2 yds fabric for main blocks - I used white Kona cotton
1/4 yd each of 6 coordinating fabrics for circles
2 yds medium weight fusible interfacing
2 yd fabric for backing - I used a confetti print flannel
38" x 50" low loft quilt batting - I bought a package that was crib sized (45" x 60")
5 yd double fold bias tape - I used 2 packs of 7/8" light gray double fold bias tape (total of 6 yds)
Coordinating thread - I used light gray to match the binding

Step 3: Use a template or circle cutter to cut out a circle that is 5" in diameter. Cut out 8 circles from each fabric.
Step 4: Repeat Steps 3 and 4 with the rest of your circle fabrics. You should have 48 circles when you are finished, 8 of each of the 6 colors.
Step 5: Cut out 48 squares that are 7 1/4" x 7 1/4" from your block fabric. It helps if you have a husband who will cut you a plexiglas template. Then there is no measuring and squaring up required! My favorite kind of fabric cutting :)
Step 6: Iron your circles and blocks.
Step 7: Fold your circle in half and press.
Step 8: Fold your circle in half in the other direction and press.
Step 10: Fold a block in half and press.
Step 11: Fold the block in half in the other direction and press.
Step 12: Repeat Steps 10 and 11 for all of your blocks.
Step 13: Place your circle on top of a block and line up the creases to center the circle and press.
Step 14: Pin your circle to the block. I used one pin in the center to hold it in place and pinned all along the outer edge. This may seem like a lot of pins, but it ensures that your fabric isn't going to go anywhere while you're sewing around the edges. No one wants a stretched out circle that more closely resembles an oval! Make sure your pins all go in one direction so they're easy to pull out as you are sewing.
Step 15: Repeat Steps 13 and 14 for all 48 blocks.
Step 16: Now it's time to sew our blocks! I used a blanket stitch to applique the circles onto the blocks. A zigzag stitch would work as well.
Step 17: Begin sewing your circle onto your block. Go slowly at first to get the hang of the turning. Your stitching doesn't have to be absolutely perfect since we'll be going over it again later, but it would be nice if it was close!
Step 18: Before you finish sewing completely around the block, pull your starting threads to the back. Continue sewing the rest of the way around, stop, and pull your end threads to the back as well. Tie threads in a knot and trim.
Note: You can skip this step if you'd like and backstitch, but tying the threads looks a little cleaner.
Step 19: Press your block. It's finished!
Step 20: Repeat Steps 18 and 19 for the remaining blocks.
Step 21: Take a break and admire your pretty blocks! There should be 8 of each color when you are finished, for a total of 48 blocks.
Next, we'll assemble the quilt top and put it all together! Click here for part two of this tutorial.
Note: I read this tutorial before making my own quilt, so several of the steps are the same, however the measurements and quilting techniques are different, and I've added a few steps for the beginner quilter (like myself).
41
 lovely designs: the circle quilt.
2.17.2010
Here is the project that's been keeping me up for the past two weeks. It's a baby quilt for my soon-to-be niece or nephew.
I wanted to make a quilt that was bright and modern and didn't scream "baby". It had to work for a boy or a girl since mommy and daddy have decided to keep it a surprise.
I backed the quilt with a confetti print flannel to make it extra warm and snuggly.
I also made a matching crib skirt out of the blue fabric used on the front of the quilt. Sadly there are no pictures since I didn't have a crib to display it on! I wrapped up the circle quilt and the crib skirt and gave them to my sister-in-law this past weekend. I was so happy to find out that she absolutely loved it! She's now plotting out what else we can make for the nursery in matching fabrics.
I've been thinking of doing a tutorial for the circle quilt. Would you all be interested? It's really simple and perfect for a first time quilter (like myself). Making this quilt was so fun, I'll definitely be making more of them in the future!
Labels:
lovely designs,
lovely quilts
4
 i heart holiday weekends.
2.13.2010
Yay for President's Day (and Valentine's Day, but that one doesn't get me a day off from work). I'm spending the weekend in the UP with my family, and unfortunately without my other half. Not all companies celebrate P-day, so he has to stay home :( A sad way to spend V-day, but I get to visit my little sister at MTU and drink a fishbowl, which excites me. I also get to gift this little project which has been monopolizing all of my time lately* and then I can finally share some pictures! I hope you all have a wonderful (and hopefully long) weekend!
*Except for the time I spent making these red velvet cupcakes. And red velvet cake balls. Have I mentioned how much I love red velvet?
*Except for the time I spent making these red velvet cupcakes. And red velvet cake balls. Have I mentioned how much I love red velvet?
3
 a new addition to my camera bag.
2.08.2010
My camera and I are very excited to have ordered a new lens tonight! This one to be exact.
I spent a lot of time researching lenses during the past month and kept coming back to this one. I'm hoping it will allow me to take decent pictures of my projects, even at night. Lately I've been having to wait until my lunch hour or the weekend to take pictures of things for this blog, and that doesn't work for tutorials when I'm doing all the steps at night! I hate using flash so hopefully this will be a good solution for me. I've been learning a lot more about photography lately and I'm finding myself wanting to take more and more pictures to practice. It's kind of fun shooting in manual mode and seeing how the pictures change while adjusting the settings. I can't wait to play with my new lens! I'm praying for fast shipping.
9
 my first quilt: the fabric.
2.02.2010
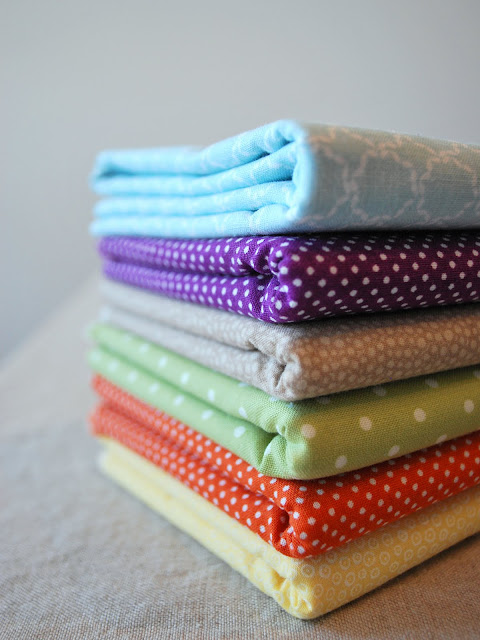
These pretty fabrics are currently occupying my sewing table, all washed and ready to be turned into my very first quilt!
I'll be posting my progress very soon, as I've only given myself two weeks to make it! What can I say, I live for deadlines :)
7
 lovely designs: the (original) ruffled wasp bag.
2.01.2010
After a whole month of guest blogging at Presser Foot, my ruffled wasp bag is finally finished. If you're sewing along, go here to learn how to put it all together.
Labels:
lovely designs,
lovely tutorials
Subscribe to:
Comments (Atom)



 Welcome to Bijou Lovely. This blog is named after my great grandmother, Bijou Lillian, who encouraged me to embrace all the lovely things that the world has to offer. I hope to provide you with inspiration for sewing, quilting, photography, design, and daily life here at Bijou Lovely! It's truly lovely to have you here.


