I made myself a Wiksten tank this week! I had to justify the massive amounts of voile headed my way from Sew, Mama, Sew's $6 sale by saying I was going to make some new shirts for myself, so I made this as a wearable muslin from some thrifted fabric I had found last week.
World's worst picture of myself, sorry! Was trying to take this fast this afternoon and my dog was jumping at my feet the entire time. He's high maintenance. This tank fits nicely with my jeans-tank-sweater uniform! I feel like I wear the same thing every day.
I wish I knew what this fabric is. It's woven and pretty flowy/silky like voile, but I don't think it's voile! It was an awesome find though for $2 for 2.5 yards.
In other news, I've updated my blog design again. Still a work in progress but I think I like it!
I also finally was able to buy bijoulovely.com! So both bijoulovely.com and bijoulovelydesigns.com will lead you here now. I've been trying to do that for about 3 years now, glad the squatters finally gave up :) And my twitter name now matches my instagram name: @bijoulovely. Victory on all counts this week with branding!
Showing posts with label lovely blog. Show all posts
Showing posts with label lovely blog. Show all posts
5
 this week.
9.27.2012
Evidence of this week's sewing! I cut into some AMH Field Study prints to test out a new bag idea.
I'm dreaming up my next quilt too, this time for fall! I really want to make a Modern Maples quilt from Pretty in Patchwork: Holidays (you can see a photo of the quilt in the preview on amazon or in the Lark Crafts Sneak Peek). Amanda is kind of a genius, and this quilt is just so pretty!
I put together a new blogger bundle at Pink Castle Fabrics yesterday with this quilt in mind! It's called Uptown Autumn (since it has a lot of prints from Jay McCarroll's new line Center City, in the Uptown colorway). And this week, you can buy it (or any other precuts or bundles) for 20% off with the code PRECUT20.
Now I'm just waiting for my book to arrive before I can get started!
In other news, Denyse Schmidt shared a link to my Chicopee feathers on her facebook page yesterday! See it there on the left? How cool is that? I was pretty excited!
Also, thank you all for the comment love on my 10 tips for better blog photos post! That post took a ton of time to write so I appreciate all of your sweet comments on it. I hope it got you thinking about ways to improve your photos!
That's about it for today! Hope you're all having a nice Thursday :)
I'm also working on a wintery quilt this week! Lots of blues (including Lux metallics!), grays, and whites make for some pretty trimmings!
I'm dreaming up my next quilt too, this time for fall! I really want to make a Modern Maples quilt from Pretty in Patchwork: Holidays (you can see a photo of the quilt in the preview on amazon or in the Lark Crafts Sneak Peek). Amanda is kind of a genius, and this quilt is just so pretty!
I put together a new blogger bundle at Pink Castle Fabrics yesterday with this quilt in mind! It's called Uptown Autumn (since it has a lot of prints from Jay McCarroll's new line Center City, in the Uptown colorway). And this week, you can buy it (or any other precuts or bundles) for 20% off with the code PRECUT20.
Now I'm just waiting for my book to arrive before I can get started!
In other news, Denyse Schmidt shared a link to my Chicopee feathers on her facebook page yesterday! See it there on the left? How cool is that? I was pretty excited!
Also, thank you all for the comment love on my 10 tips for better blog photos post! That post took a ton of time to write so I appreciate all of your sweet comments on it. I hope it got you thinking about ways to improve your photos!
That's about it for today! Hope you're all having a nice Thursday :)
Labels:
blogger bundles,
lovely blog,
lovely designs
76
 10 Tips for Better Blog Photos.
9.24.2012
I was honored when Beth at Plum and June asked if I'd write a post for her "Advice for New Bloggers" series! I'm going to give some tips on improving your blog photos, since I've been meaning to write about it anyway :) These tips are most relevant for taking photos of your sewing and craft projects (and fabric!) but most of them can apply to all photography!
1. Take photos in natural light!
This is the single most important rule, and I cannot stress it enough! Taking photos in natural light rather than at night or under artificial lighting is the simplest way to improve your photography. Find a few places in your house (or outside) where the lighting is good, and take your pictures there regularly. I have about 4 spots inside my house that I know will usually have good light because they're near a few windows: my cutting table, the kitchen table, one corner of my living room, and our guest bedroom. Our backyard is great for quilt photos too since I can hang the quilts off of our fence. Almost 100% of my pictures are taken in one of these 5 places!
Also, be mindful of when your designated photography spots get the best light! This mainly depends on the direction the windows in that room face. My sewing room gets the best light in the early afternoon, so that's when I usually take my photos! It's worth waiting so your pictures have the best chance of turning out, and you'll have to take less time editing later to get a good shot!
2. Pay attention to perspective.
It's easy to take pictures of something sitting on a table while you're standing at your normal height. It doesn't always make for the best photo though!
Especially for quilt photos, a straight on view of the quilt is an important shot to take! Move around while looking through the camera lens to see what other perspectives make for interesting shots. You can take a few pictures from different points and decide later which ones work best.
1. Take photos in natural light!
This is the single most important rule, and I cannot stress it enough! Taking photos in natural light rather than at night or under artificial lighting is the simplest way to improve your photography. Find a few places in your house (or outside) where the lighting is good, and take your pictures there regularly. I have about 4 spots inside my house that I know will usually have good light because they're near a few windows: my cutting table, the kitchen table, one corner of my living room, and our guest bedroom. Our backyard is great for quilt photos too since I can hang the quilts off of our fence. Almost 100% of my pictures are taken in one of these 5 places!
The natural light shots here were taken in the early morning, they would turn out even better if I waited until the light was shining in the windows more.
2. Pay attention to perspective.
It's easy to take pictures of something sitting on a table while you're standing at your normal height. It doesn't always make for the best photo though!
Not a very good picture.
Many times your picture could be improved if you get right at eye level. If you're above your subject, bend your knees to get at the same level.
This one is at a better angle. Pillows are at eye level and shot straight on.
The quilt looks crooked here!
Straight on gives a better view of the quilt!
For fabric photos, think about how you can lay it out to best display the range of colors and prints.
Overhead shots give a fun view of what's going on while you're working on a project! Stand on a chair or put the item on the ground and stand above it to get an overhead shot. Different perspectives will keep your photos fresh!
An interesting view of my fabric selections for a new bag.For fabric photos, think about how you can lay it out to best display the range of colors and prints.
This is an okay photo, but it doesn't really show the color variance in the fabric. The gridded backdrop is a little distracting and looks similar to the gray fabric.
These ombre prints change vary in color along the width of the fabric, so fanning them out is a better way to display them than all stacked up!
Shows color variance in the fabric, and the white background makes the colors pop! Also a different perspective that adds a little more interest to the photo.
3. Choose a simple background.
Try to isolate your project by picking background that won't compete with the subject. This doesn't mean that you have to use a completely white background, a simple print works well too! You just want to have some contrast between your project and the background to make your project be the focal point.
The background is too busy here, it draws more attention than the pincushion.
Much better! Even though it's a print, your eye is drawn to the pincushion.
4. Learn how to use your camera in manual mode.
Read the manual that came with your camera! It will tell you everything you need to know to shoot in manual mode. Stop using the Auto setting on your camera!
Read the manual!
Learn how to manipulate the aperture, shutter speed, and ISO. When you learn to adjust the settings, you'll have more control over the way your pictures turn out! This series from The Pioneer Woman is great for explaining the basics of photography in simple terms.
Using manual mode let's you have more control over the depth of field, among other things. The focus on the center rolls of washi tape here while everything else is blurry is intentional and can be controlled using manual camera settings.
5. Turn off the flash!
Using flash often makes your photos look flat. You lose the depth, dimension, and shadows that you get when the flash is off. If you are following rule #1, you probably don't need flash anyway. And if you've mastered rule #4, you know how to manipulate the settings on your camera to let more light in without using the flash. You can also buy a reflector or a piece of white foam board to help bounce more light on your subject to avoid flash.
Notice how you can't see the quilting lines in the flash photo? The photo with no flash gives the photo depth and dimension.
6. Tidy up your space.
This is one of those rules that can sometimes be broken, but for the most part, it's best to take the clutter out of your photos! It's distracting and looks messy! If there's something else that's unrelated to your subject in the frame while you're taking a picture, move it. This is a good rule to follow when you're photographing a finished project especially.
Clutter doesn't add anything to this photo. It's just distracting.
On the other hand, sometimes taking a picture of the happy mess that happens while creating makes for a fun photo too! The key is to make the clutter in your photos intentional rather than leaving it in because you don't feel like picking up. Scraps, patterns, and tools that you're currently using are all relevant in these types of pictures.
Happy mess! It's relevant to the project and helps portray that it's a work in progress.
(Also, overhead shot! Great perspective for WIPs.)
If you're taking pictures of a stack of fabric, don't just throw them in a pile! Press them and fold them all nicely in the same manner so that they are uniform in size. (Jeni has a great folding tutorial!) This ensures that the focus stays on the pretty fabric rather than the random sizes or the wrinkles in the fabric!
This looks messy. My eyes are drawn to the torn edges and the variances in size.
A pretty stack of fabric! The focus stays on the prints and colors of the fabric. The grid doesn't really detract from this photo since the prints are so bold.
Here I notice sloppy folding and wrinkled background fabric!
This is much better! No wrinkles and consistent folding.
7. Add context to your photos.
Consider styling your photos a little to give them some context. In my opinion, this is the rule that will give your photos that "wow" factor. It's the difference between a nice photo and one that seems like it should be in a magazine. This is the fun part! Be creative. Try to place your subject in a place it might be used in real life. If you made a bag, lay it down with some of the things you might put in the bag looking like they've spilled out of it, or sit it down on a bench like you do with a bag when you get home from being out. These types of photos add context to show what the purpose of the project really is.
There's nothing wrong with this picture, it's just a little boring!
This photo is a little more fun! Like I just plopped my bag down on a bench in the hallway. Bonus points for coordinating colors in my styled accessories with the project!
If you made a quilt, take photos of it in a place you think it might be used, casually sprawled out on a couch, layed out on your bed, folded up on a shelf or chair, etc.
Another way to add context is to try to portray what you're trying to say about your picture without words.
In this photo all you see is a bunch of triangles, and you're not sure why they're here.
But in this picture, you can probably figure out that I just cut these out! The triangles are on my cutting mat, which is where I actually cut my fabric. The ruler I used to cut them and my rotary cutter are in the photo, so I don't really even need to explain my cutting method in words if I don't want to.
Adding context like this to photos is especially helpful in tutorials! Readers can skim through the pictures and get an idea of the steps they need to go through without reading through all of the instructions.
7. Do some basic editing.
Most photos can benefit from a little editing! Sharpen the photo a bit, increase the contrast, adjust the brightness, and increase saturation if necessary. You can also adjust the white balance (or temperature) if the photo seems like it has a blue or yellowish tint to it. Crop the finished photo to a smaller size so it will load faster in your blog posts. I use Photoshop to edit my pictures, but there are lots of free programs out there that will let you do basic editing as well, and tons of tutorials to show you how to do it (Google is your friend!!).
8. Use your camera, not your phone!
There's nothing wrong with an Instagram mash-up post every now and then, but don't use your phone to regularly take photos for your blog if you have a better camera to use! Cameras on phones are improving, but a real camera is still better!
9. Once you've uploaded your photos to your blog, make them larger!
You spent all that time taking nice photos, so show them off in your blog post! There's nothing worse than little thumbnail pictures in a blog post.
So small!
Learn how to change the size of your pictures so they fill up the width of your blog! In Blogger, you can click on the photo and select a size right there. You can also go into the html tab to resize your photos manually. There are tons of tutorials out there to do this as well!
Much better!
10. Practice makes perfect!
The more you practice, the easier it will be to take good photos!
So that concludes my 10 tips for today... but I'm sure there are a bunch that I missed! What's your best tip to improving blog photos?
Labels:
lovely blog,
lovely photography,
lovely tutorials
5
 Nursery Versery Contest - Please vote!
8.27.2012
Happy Monday everyone! I am having such a good day today! I just found out that my Nursery Versery quilt made it to the final round of Rachel's contest.
The other two projects are really cute too! Please take a second to vote for your favorite over at Stitched in Color! The contest ends tomorrow, August 28th at midnight EST. Thanks so much! :)
13
 new look!
2.09.2012
Notice anything different around here? I did a little blog redesigning last night. It's still a work in progress but for the most part it's implemented. I want to clean up my tutorials, quilts, and category pages to make it easier to find what you're looking for around here, but it was 2am and I needed to go to bed! (Stop over from your reader to the blog to see the new updates!)
I put together a new header, added a few new pages at the top, and made the text a little easier to read, added some social media icons that I designed, moved the search bar up (still working on the layout of that, not loving it at the moment), and cleaned out my main sponsor section. I've decided to take on some new sponsors, so if you're interested in advertising on Bijou Lovely, please check out this page.
Further down I've added a new blog button, feel free to add it to your blog if you'd like!
Please let me know what you think of the change! If there's anything else you want me to improve on while I'm at it, let me know in the comments! Threaded comments would be nice...I'm looking into that as well.
I put together a new header, added a few new pages at the top, and made the text a little easier to read, added some social media icons that I designed, moved the search bar up (still working on the layout of that, not loving it at the moment), and cleaned out my main sponsor section. I've decided to take on some new sponsors, so if you're interested in advertising on Bijou Lovely, please check out this page.
Further down I've added a new blog button, feel free to add it to your blog if you'd like!
I also moved my blog list to the sidebar instead of including it on a separate page. So check there if you're looking for more sewing inspiration!
11
 sewing summit.
7.19.2011
I just registered and booked my flight to the Sewing Summit in Salt Lake City!


In case you've somehow missed it, here's a description of the Sewing Summit from their website.
"We are a sewing and blogging conference for the modern sewist who wants to connect with others in a fun and inspiring setting. We are planning classes, panels, speakers, vendor demonstrations, networking events and more. Whatever it is that you sew - garments, handbags, kids items, quilts - they'll be classes and activities for you!"
4
 happy 1 year and swatch 2.0.
11.11.2010
It's been a whole year since I started this blog! Time has sure flown by. I'll be having a little giveaway next week to celebrate, but in the meantime I wanted to share another lovely color swatch.
Thank you for all of your continued support and your sweet comments. They mean the world to me!
3
 Flickr Friends & Facebook.
8.11.2010
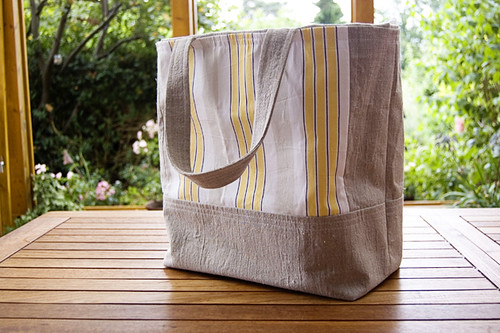
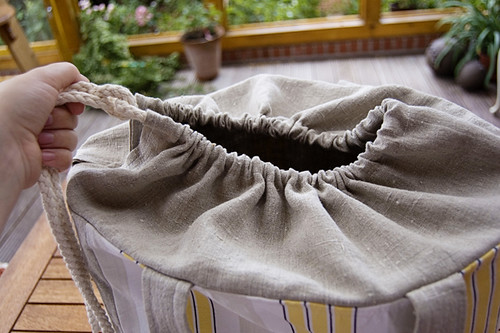
Now that I have a Flickr group, I can start sharing your projects! It's so much fun seeing what you come up with. Jenny made two market totes, and even turned one of them into a beach bag with a drawstring closure.
I love the striped fabric she used in her second tote, and the drawstring closure is genius! Nice job Jenny!
If you've made something using one of my tutorials, don't forget to share your projects in the Bijou Lovelies Flickr group. I also finally got with the times and created a Facebook page. You can now "Like" Bijou Lovely (and I would love it if you "Liked" it!)!
13
 shiny new blog.
7.22.2010
I am thrilled to finally launch my new blog design! Please stop over if you're viewing from your reader. I have to thank Kelly from Blushink! for doing a fabulous job on the site and putting up with all my craziness.


Notice anything else that's new? I finally got my own domain! Now you can find Bijou Lovely at www.bijoulovelydesigns.com! If you subscribe, everything should automatically transfer, but if it's not working please remember to update your feed.
Take a look around the new site and let me know what you think! Please let me know if you see any issues, other than the need to resize my old pictures. And yes, I do have a link to my empty Etsy shop at the top. Hopefully the lack of listings will be the next issue I focus on.
1
 Question, anyone?
2.24.2010
I caved and finally created a formspring account yesterday. I've only answered a few questions but it's kind of fun so far! My inbox is currently empty so if you have a question for me you can enter it in the box on my sidebar or by clicking here. Also if you have an account, leave it in the comments so I can follow you!
2
 presser foot - cutting the fabrics.
1.18.2010
The next post in my ruffled wasp bag adventures is up on the Presser Foot blog. Go there now (please) and find out how to cut your fabrics!
Subscribe to:
Posts (Atom)


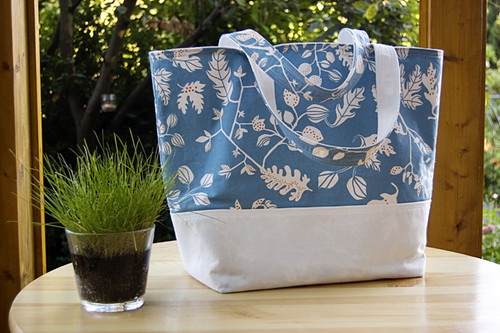

 Welcome to Bijou Lovely. This blog is named after my great grandmother, Bijou Lillian, who encouraged me to embrace all the lovely things that the world has to offer. I hope to provide you with inspiration for sewing, quilting, photography, design, and daily life here at Bijou Lovely! It's truly lovely to have you here.


