6 pillowcase dress.

6.24.2011

I took my first steps into sewing clothing last night.  I'm not sure if it actually even counts to be honest, I just made a pillowcase dress for my niece Aliyah.  It was so easy to make, I think it took less than 2 hours from start to finish!
The pillowcase was made by her great grandmother.  I still have the second pillowcase in the set in case we have a little girl of our own one day.
I used an aqua satin ribbon for the strap, but it would be really easy to swap it out for another color if she wants to.  The ribbon is excessively long right now, but I'll trim it once she tries it on.  I didn't want to cut it too short!
I used a combination of this tutorial (for using a ribbon strap rather than elastic in the casing) and this tutorial for the sizing.  Both tutorials were wonderful.
I'm really excited to give this to Ali while she's visiting next weekend!  

14 sewing lessons.

6.23.2011

While I was out with a couple of my newest girl friends a few weekends ago, they brought up the fact that they read my blog.  This may seem a little strange, but I don't talk about the fact that I sew or have a blog with most of the people I see in my everyday life.  In fact, I almost never bring it up unless someone specifically asks me about it.  It's not that I'm embarrassed of what people will think of it (I'm not even sure most of the people who live here even know what a blog is) but I just feel awkward talking about myself and my blog to people who aren't actually interested.  If someone is interested, however, I will proceed to talk a person's ear off about sewing and blogging!  Which is what happened on this night.  The girls mentioned that they enjoy reading my blog and that they would love to learn how to sew someday.  I have been dreaming of starting some sort of sewing classes in my area as I have heard this from several other people as well, so what could be better than starting with two of my friends?

We had our first lesson last night and it was a huge success!  I had so much fun teaching them the basics of cutting fabric, using a sewing machine, figuring out seam allowances, pressing seams, etc., and we even finished our first project...weighted pincushions.

Jackie made this really fun aqua, chartreuse and gray cushion
and Kate made this super cute pink, chartreuse, and dark gray one.
Aren't they adorable?  It was so much fun watching them sort through my scraps, come up with a design, choose their fabrics, and sew these together.
I think it's safe to say we'll be have more sewing classes in the very near future.  We're already talking about what we'll make next!  Thanks Jackie and Kate for being my guinea pigs!  :)  If anyone else happens to live in the UP/Northern WI area that would be interested in lessons, please send me an email!

14 sewing room progress.

6.22.2011

Pictures of my sewing room with its new pretty paint color are long overdue.  In all honesty it's been too much of a mess lately to even think of bringing a camera in here!  But I cleaned up a bit yesterday so I can finally share it with you.
It's still a work in progress... there is currently a naked lightbulb hanging from the ceiling right now, a half painted dresser in our basement waiting to be placed along the left wall of the picture below, a design wall that is mostly built and ready to be hung, and of course I want to hang artwork and some additional shelves to make it a little more functional.  But the aqua is gone and it isn't painful for me to walk in this room anymore!
Eventually I'd like shelves all the way up the wall where I have my fabric storage now, maybe a couple of white Expedit units from IKEA?  Oh, how I miss being able to drive 20 minutes to spend hours in that store.
Can you tell which colors I'm lacking in my stash?  It was pretty obvious after I finally arranged everything by color.  I have almost no purple prints, which is funny since it's one of my favorite colors (after gray, of course)!
The color on the walls is Behr Grape Cream, and I love it!  It is the perfect shade of gray with just a hint of purple.  I love the way the white shelves pop against it.
Of course I'll share more pictures once the room is finished!  Hopefully by the end of the summer.

12 winding staircase block (and a mini-tutorial).

6.21.2011

This weekend I put together a block for Jan of Daisy Janie.  Are you all familiar with her gorgeous organic fabrics?  Shades of Grey is one of my favorite fabric lines ever... I need to buy some soon!  Anyway, Jan chose 10 quilters to make blocks for a Project Linus quilt made of her first fabric line, Geo Grand.  She sent us each eight charm squares to be made into a finished block, any size, any style.
It was a bit of a challenge for me to come up with this block.  I always feel so limited when using charm squares, simply because of the 5" length/width restriction it puts on any design.  I also almost always incorporate solids into my designs, so making a block with all prints was a little out of my comfort zone.  I did my best to alternate the brown and white prints with the colored ones throughout the block as places for the eye to rest.

I was inspired by the shapes in the Hip Squares print, which kind of reminded me of an aerial view of a winding staircase.  I fussy cut one of the squares for the center of my block.  
Then I cut out several strips of each fabric (3/4", 1", 1-1/2", 1-3/4", and 2-1/4") and sewed the equal sized rows together for all but the largest strips. 
I pieced together the strips in a log cabin, using smaller strips in the center and cutting larger widths from each log building out from the center.  It was very much an improvisational block, I just kept sewing strips together and building it out until I ran out of fabric strips in each appropriate size.
I hope you like the block, Jan!  I'm looking forward to seeing the finished quilt.  Thank you so much for the opportunity to make a block for you!

2 white house visitors.

6.10.2011

I haven't wrote any posts about The White House in a long time.  Business is good, and it's really starting to pick up this summer.  We've had a few special visitors in the past couple months, so I thought I'd share some pictures with you!

In March, my parents hosted a meet and greet with Michigan's U.S. Senator Carl Levin.  I was out of town for that event, but here are few pictures from the Dickinson County Democratic Party.


This past week, we hosted another meet and greet, this time for Michigan's First District U.S. State Rep Dan Benishek.


It's been kind of fun hosting these types of political events!  I know my parents really enjoy it, especially my dad.  It's kind of fitting for a Tavern & Grill called "The White House", don't you think?  Now if we could just get President Obama to visit...

14 hello summer.

6.08.2011

Is anyone else experiencing a heat wave the past two days?  Oh my goodness it is HOT out there.  Not that I'm complaining...but since our pool still isn't up and running we aren't enjoying it as much as we could be.  One thing that I am enjoying though in this warmer weather is our garden!  We built a raised bed in our backyard out of bricks this spring, and last week it was finally warm enough to plant things in it.
The garden has two levels, and is kind of shaped like a kidney bean.  We needed something that would fit in the corner of our property line to take the focus off of our neighbors' white fence and the edge of the woods behind it.  The fact that it's raised also helps to prevent our deer and rabbit friends from trampling and/or eating all of it.  The liquid fence deer repellent we spray around it helps with that as well...although it doesn't smell the best!
In the top row I've got 4 different tomato plants, green, red, and banana peppers, basil, parsley, and cilantro. 
 In the bottom row there's zucchini, scallions, carrots, and cucumbers.  I also planted some mint along the edge of the yard, and I'm hoping that it will spread into the woods a bit.
I've kept it all alive for a week so far, which is good for me.  I've been watering like crazy since it has been over 90 degrees the past two days.  Everything is looking healthy and growing in nicely, and we've only had one minor incident with deer snacking.  I even have a few little tomatoes starting to grow.  I'm praying for lots and lots of home grown vegetables this summer!

We've got some other things growing in our yard as well, it's kind of fun to see what everything is as it pops up!  We had no idea what most of the plants would be since we moved into our house this past winter when everything was cut back and covered in snow.


I'll share more pictures once things grow in a bit more.  Hope you're all keeping cool!

25 herringbone quilt.

6.03.2011

It's finished!  How's this for a fun summer quilt?
The blocks were made by the members of the Inspire Circle of do.Good Stitches using my herringbone block tutorial.  They are all so vibrant!  There are definitely lots of different colors and prints going on in here, but I think it works.
I quilted horizontally along the seams to stabilize the quilt, then I went through three of the diagonal lines in each block.
 You can see the quilting a little better on the back.  I used this awesome chevron print as the focal point of the back, to kind of tie in with the herringbone pattern going on in the front.  I only had a half yard of it though so I had to make it scrappy.
 Here's another look at the quilting on the back.  I used gray thread so it wouldn't stick out as much on the back.  I haven't washed the quilt yet but it should shrink up nicely in the dryer!  There really aren't any puckers on here, even though it kind of looks like it in the pictures.
I thought it was only fitting to bind it in this aqua herringbone print from Modern Meadow!  I love the way it looks against the colors in the quilt.
I kind of want to make another one of these quilts for myself!  Wouldn't it be great as a picnic blanket?
This one is all ready to be shipped off to Project Linus!  Thank you again to all the lovely ladies in the Inspire circle for your contributions to this quilt.  
If you make a herringbone quilt, please share it in the Bijou Lovely flickr group, I would love to see it!

7 pretty little pouch swap complete.

6.01.2011

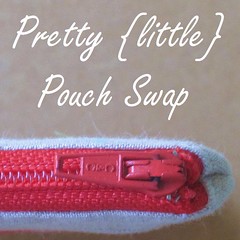
This is a few weeks late, but I wanted to share the packages I sent and received for the Pretty {little} Pouch Swap.
pouch icon
My partner was one of the swap organizers, Michelle from i like orange, too!  I was really excited to have her as my partner because we have similar styles and I was confident I could come up with something that she'd like.  I took inspiration from her swap mosaic and noticed lots of Echino, some linen, and a pouch with ruffles and I went from there for the first pouch.  I made sure it was pretty large and had gussets because she asked for a pouch with a lot of space in it!
The second pouch wasn't based on her mosaic, but from reading her blog and looking through flickr I knew she's a lover of brights!
Of course I made the lining orange as a nod to her blog name!
I added in some vintage trims that I had found while thrifting since her flickr profile says she likes them!
With few fabric scraps thrown in for good measure and a little note, the package was complete.
Here it is all wrapped and ready to be sent.
I also received my package from Megan at Canoe Ridge Creations around the same time.
Isn't it a gorgeous pouch?  You all know how much I love brights mixed with gray, so this pouch is perfect for me.  I was so happy to have it arrive at my door!  My favorite part of it is actually the back, just look at all those rainbow colored threads!
She included some fun colored zippers and a lovely note in the package as well.  I'm sure the zippers will be put to good use for more pouches, I can definitely say I'm addicted to making them now!
Thank you so much Megan for the wonderful package!  This was a really fun swap and I'm sure I'll be participating again in the future.
Related Posts with Thumbnails
 

Blogging tips