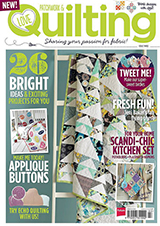
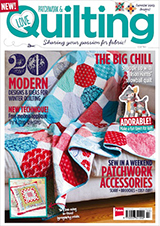
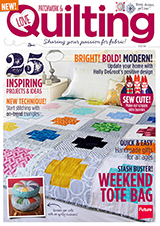
I'm still trying to catch up after being gone for a few days, but I wanted to share this pillow I made for Issue 9 of Fat Quarterly with you! The issue is all about sewing with and for kids, and it's packed with a ton of fun projects. You'll find the details on how to make this pillow in the magazine, which comes out on April 30th.
It was really fun to participate in this Designer Challenge! The focal fabric is Woodland Tails by Sherri Berry. You'll also find a picture of my herringbone quilt in the article about Project Linus, along with a few other quilts from our do.Good Stitches Inspire circle.
13
 Colorblock quilts.
4.25.2012
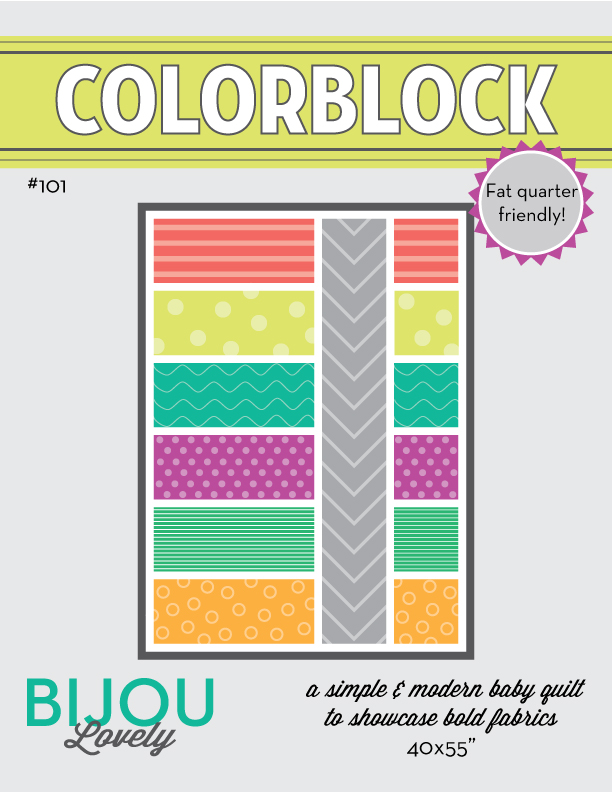
Thank you so much to everyone who has purchased my Colorblock Quilt Pattern! I really appreciate your support.
Today I wanted to share some of the Colorblock quilts that my pattern testers made. I had planned on writing this post last week, but ran out of time before we headed off to San Francisco for a long weekend, so I apologize for the delay. I cannot thank my pattern testers enough, they've been so great throughout this process and really helped me to refine the pattern directions to make them clear and easy.
Here's a quilt from Megan of Notes from the Bench. I love the mix of contrast between the blocks!
Jamie of Busy Bee Quilts used Hello Pilgrim prints for her quilt, it looks so beautiful!
Erica of Happy Fabric made this fun quilt, I love the red binding!
Jen used some bold colors and graphic prints, it looks great!
Marcia of Little Pink Rose Quilting & Sewing made this pretty floral version. So springy and cute.
Shanna of Sweet and Sassy made this space quilt, perfect for a boy!
Marti of 52 Quilts in 52 Weeks used some Valori Wells fabric, I love the color combo here and how well it coordinates with the column print.
Suzanne of Class Creations made this sweet girl version. I love the use of the Children at Play panel with a border for the column. Very clever!
This pretty quilt is from Brittney of Brittney Selby Quilting. The brown sashing is perfect with these prints.
Ella of throw a wench in the works made this cute rainbow version. I'm always a sucker for rainbows.
Colby of sew.quilt.explore. made this colorful version, and even tried out some wavy quilting on it!
Ramsey made this gorgeous version. Again, I love the colors here!
Last but not least, Mandi made this fun lime and black quilt. Stripes are always a great choice for the column fabric!
Thanks so much to all of my pattern testers! You all did a fantastic job :)
23
 Colorblock Quilt Pattern now available!
4.18.2012
The long-awaited Colorblock Quilt Pattern is finished! You can purchase it in my new pattern shop!
The pattern features tons of cutting and assembly diagrams to help you make this 40 x 55" baby quilt, along with helpful tips to make the process even easier. Purchasing the pattern also gives you a license to sell any colorblock quilts you've made on a home-based production level.
I have lots of pattern testers to thank for helping me make sure the pattern was easy to understand. I wanted to make sure it was just as easy for beginners as it is for more experienced quilters! Tomorrow I'll share some of the gorgeous quilts that were made by my testers.
Here are the two quilts that I've made using this pattern. One for a baby boy...
and one for a baby girl.
This quilt is seriously so fast and easy to make! The pattern is available in PDF form and will be emailed to you immediately after purchase. If you have any questions, please don't hesitate to contact me!
18
 two of a kind.
4.17.2012
I flew through these two quilts last week, just in time to gift them to two of my friends who are having baby boys very soon. The girls are sisters-in-law and they're both due with their first child within a few days of each other. How fun is that? These little cousins were destined to have matching quilts!
I had planned on just doing simple patchwork, but somehow made my squares way too small! Apparently I forgot to look back at my measurements to see how big I should make the squares before I started cutting. I didn't have much of a few of the fabrics left so I had to figure out another way to bring the quilts up to size. I had seen this quilt by Kelly and must have filed it away in my head, so the idea of an off centered rectangle was the first thing I thought of. This gray Lisette chambray from JoAnn was the perfect fabric to use for the front!
I quilted both of the quilts the same, through the diagonal of each patchwork square, and then with intersecting straight lines which created a grid where the lines overlapped. It looked really cool when it was finished, although it was definitely tedious while I was quilting!
It's bound in another Running Stitch print from Patty Young's Lush collection. I love the way the orange looks as a frame around all the gray.
I had a lot of yardage of this green dot I bought a JoAnn forever ago, so I decided to use it up as the backing of each quilt.
Overall I was pretty happy with how these turned out, considering I only had a little over a week to put them together!
I can't wait to see the two little guys all wrapped up in their matching quilts soon!
11
 sneak peek.
4.11.2012
Just a little blurry sneak peek of what I've been working on this week. So many straight lines, so little time.
12
 happy mail.
4.10.2012
Today I received the most beautiful mini quilt from my friend Jen of mj & co.
I met Jen through Instagram, and got to know her when I offered to help her pretty up her blog a bit. In return, she offered to make a mini for me to hang in my sewing room! I made the most random mosaic of inspiration ever, and somehow she translated my love of scrappy improv, wonky stars, Melody Miller typewriters, and Good Folks into this gorgeous work of art!
Oh yes, and we can't forget the straight line quilting! I also love the text prints thrown in there!
Jen labeled the back using this cute notebook fabric.
And did a little FMQ outline around the details of the typewriter! I just love that heart!
This has already made it's way up onto the wall, and it makes me smile every time I look in that direction!
I am so grateful for all the work Jen put into this mini quilt for me! It is absoultely perfect. And did I mention how great it is that we can find new friendships in something like Instagram? Love that! Thank you Jen for making my day today!!
9
 bathroom update.
4.09.2012
I hope everyone had a nice holiday weekend! I didn't mess up the ham, so thanks for crossing your fingers :) We spent a good portion of the weekend putting the master bathroom back together. It's still not finished, but it's actually semi-functional now!
We sealed the floors and installed the vanity, toilet, and light fixtures on Saturday. Obviously we're missing a sink, due to a faulty bolt in the countertop, but we should be able to fix that this week and get this side of the bathroom totally functional! We're also still missing a shower door and fixtures, trim, and we need to paint the door and add the other bathroom fixtures and figure out shelves in here, among other things. Definitely work left to be done!
Can I tell you how happy these pendant lights make me? They are my favorite part! Along with the floors of course.
I think it's about time to buy some accessories for the room. I already have a few items on my wishlist at West Elm!
11
 kaleidoscope mini quilt.
4.06.2012
I hope you all enjoyed the Kaleidoscope Quilt Block Tutorial yesterday! I wanted to share a few more pictures and details about the mini quilt I made with my kaleidoscope blocks.
The idea for this block came from a doodle I made on the back of a business card at work. Sometimes inspiration strikes when you're not expecting it! Basically I wanted to use the idea of HSTs in different sizes and orientations that were spaced out within a quilt. I added in the colored rectangles that make the pinwheel shapes (the green in this quilt) once I drew it up in Illustrator, and when I started putting the blocks together I was happily surprised to see the secondary patterns (including the wonky-ish star in the center!) that appeared. It was kind of a happy accident!
I used the Running Stitch prints from Patty Young's Lush collection that I had bought recently. I wanted something mostly solid, but I also wanted a directional print so you could tell that I was playing with the orientation of the HSTs. This subtle stripe was perfect, and it doesn't hurt that the colors are so vibrant and springy.
I used a hera marker (my new favorite tool!) to mark two lines through the center at a diagonal, and then quilted straight lines in 4 V's starting in the center of the quilt. It was a little bit tedious but luckily since it was only a small quilt I finished it quickly.
I backed the quilt in the yellow zigzag from Heather Bailey's Pop Garden, and bound it in the Raspberry Running Stitch print.
It's hanging up on the wall in my sewing room for now. I think it might stay there! :)
Happy Friday! I hope you all have a nice Easter weekend. My weekend will be packed with bathroom work (we're installing the fixtures this weekend!), sewing, cleaning, and cooking. We're hosting Easter dinner on Sunday! Fingers crossed I don't mess up the ham :)
19
 kaleidoscope quilt block tutorial.
4.05.2012
Hi everyone! I'm so excited to be today's stop on the Festival of Half Square Triangles! I've got a block tutorial for you today that utilizes some half square triangles and a few rectangles to make a fun pattern that reminds me of looking through a kaleidoscope.
We are going to be making a single Kaleidoscope block in this tutorial, which looks like this:
Kaleidoscope Quilt Block Tutorial
Note: all seam allowances are 1/4".
1. For each block, you will need to cut the following pieces:
Color A: 2 - 3" squares
Color B: 2 - 3" squares
Color C: 2 - 5" squares
Color D: 4 - 8.5 x 2.5" rectangles
Background fabric: 4 - 3" squares
2 - 5" squares
4 - 2.5" squares
4 - 2.5 x 4.5" rectangles
4 - 2.5 x 6.5" rectangles
2. The pieces cut from Color A, B, and C will all be made into HSTs, along with your 3" and 5" squares cut from the background fabric. Pair each of the A & B fabrics with a 3" background square, matching them up right sides together (RST). Then repeat with the C blocks and the 5" background squares.
3. Use a ruler and a hera marker or pencil to mark a line down the diagonal of each of your pairs.
6. Press seams open.
7. Trim your HSTs. A & B units should measure 2.5" square, and C units should measure 4.5" square.
8. Now, onto assembly! Arrange your A & B HSTs as shown below, with a 2.5" background square in the middle. Make sure the orientation of the HSTs is exactly as shown.
9. Sew each A unit to the left side of a 2.5" square. Then sew each B unit to the right side of the 2.5" square. Make sure to keep your units in the same orientation you had arranged them in during Step 8. Press seams open when finished.
10. Arrange your C units as shown with a 2.5 x 4.5" background rectangle.
11. Sew each C unit to the left side of each 2.5 x 4.5" rectangle. Make sure to keep your units in the same orientation you had arranged them in during Step 10. Press seams open when finished.
12. Arrange units as shown, with A-B unit on top, a 2.5 x 6.5" rectangle in the middle, and your C units on the bottom.
13. Sew the top side of each C unit to the bottom edge of each 2.5 x 6.5" rectangle. Then sew the bottom side of your A-B unit to the top edge of each rectangle. Make sure to keep your units in the same orientation you had arranged them in during Step 12. Press seams open when finished.
14. Arrange units as shown. Sew each A-B-C unit to the left side of each D rectangle. Press seams open when finished.
15. Now you should have 4 finished units that look like this (sorry for the bad picture...somehow I forgot to take one at this point):
16. Arrange your finished units into a block by turning each unit 90 degrees with the Fabric D rectangles meeting in the center.
Each kaleidoscope block measures at 16.5" square, which means 16" square once they are sewn together. Make as many blocks as you like to bring your quilt up to your desired size! I made four blocks to make this mini quilt, which measures 32" square. I love the wonky little stars that form when you join these blocks together! I'll share the rest of the quilt details tomorrow! (Update: See quilt details here!)
I hope you enjoyed this stop on the Festival of HSTs! Please let me know if you have any questions on this tutorial. Make sure to stop by at Canoe Ridge Creations to follow along with the rest of the series and make sure to enter your own HST quilts to win some great prizes starting April 16th!
Kaleidoscope Quilt Block Tutorial
Note: all seam allowances are 1/4".
1. For each block, you will need to cut the following pieces:
Color A: 2 - 3" squares
Color B: 2 - 3" squares
Color C: 2 - 5" squares
Color D: 4 - 8.5 x 2.5" rectangles
Background fabric: 4 - 3" squares
2 - 5" squares
4 - 2.5" squares
4 - 2.5 x 4.5" rectangles
4 - 2.5 x 6.5" rectangles
3. Use a ruler and a hera marker or pencil to mark a line down the diagonal of each of your pairs.
4. Stitch down each side of your pair, 1/4" to the right and the left of the line you made. Continue with the rest of your pairs. This is a great opportunity to chain piece your HST units to finish them faster and conserve thread!
5. Use a ruler and a rotary cutter to cut along the line you marked on the diagonal. Now you have two HST units! Continue with the rest of your units.6. Press seams open.
7. Trim your HSTs. A & B units should measure 2.5" square, and C units should measure 4.5" square.
8. Now, onto assembly! Arrange your A & B HSTs as shown below, with a 2.5" background square in the middle. Make sure the orientation of the HSTs is exactly as shown.
9. Sew each A unit to the left side of a 2.5" square. Then sew each B unit to the right side of the 2.5" square. Make sure to keep your units in the same orientation you had arranged them in during Step 8. Press seams open when finished.
10. Arrange your C units as shown with a 2.5 x 4.5" background rectangle.
11. Sew each C unit to the left side of each 2.5 x 4.5" rectangle. Make sure to keep your units in the same orientation you had arranged them in during Step 10. Press seams open when finished.
12. Arrange units as shown, with A-B unit on top, a 2.5 x 6.5" rectangle in the middle, and your C units on the bottom.
13. Sew the top side of each C unit to the bottom edge of each 2.5 x 6.5" rectangle. Then sew the bottom side of your A-B unit to the top edge of each rectangle. Make sure to keep your units in the same orientation you had arranged them in during Step 12. Press seams open when finished.
14. Arrange units as shown. Sew each A-B-C unit to the left side of each D rectangle. Press seams open when finished.
16. Arrange your finished units into a block by turning each unit 90 degrees with the Fabric D rectangles meeting in the center.
17. Sew the top two units together, and the bottom two units together. The sew along the center to join and finish your block.
18. You're done! Each kaleidoscope block measures at 16.5" square, which means 16" square once they are sewn together. Make as many blocks as you like to bring your quilt up to your desired size! I made four blocks to make this mini quilt, which measures 32" square. I love the wonky little stars that form when you join these blocks together! I'll share the rest of the quilt details tomorrow! (Update: See quilt details here!)
I hope you enjoyed this stop on the Festival of HSTs! Please let me know if you have any questions on this tutorial. Make sure to stop by at Canoe Ridge Creations to follow along with the rest of the series and make sure to enter your own HST quilts to win some great prizes starting April 16th!
Labels:
lovely designs,
lovely tutorials
Subscribe to:
Comments (Atom)


 Welcome to Bijou Lovely. This blog is named after my great grandmother, Bijou Lillian, who encouraged me to embrace all the lovely things that the world has to offer. I hope to provide you with inspiration for sewing, quilting, photography, design, and daily life here at Bijou Lovely! It's truly lovely to have you here.


